by David Deen www.daviddeen.com @DavidDeen3
Going from a concept to a final artwork can be a mysterious affair. Because every artist has their own process, I can’t show you “how it’s done,” (no such thing exists). I can, however, show you how I do it. I’ll show you how I get from messy concept sketch to final ready-to-be-painted drawing. It’s sometimes funny, sometimes ugly, but hopefully somewhat informative.
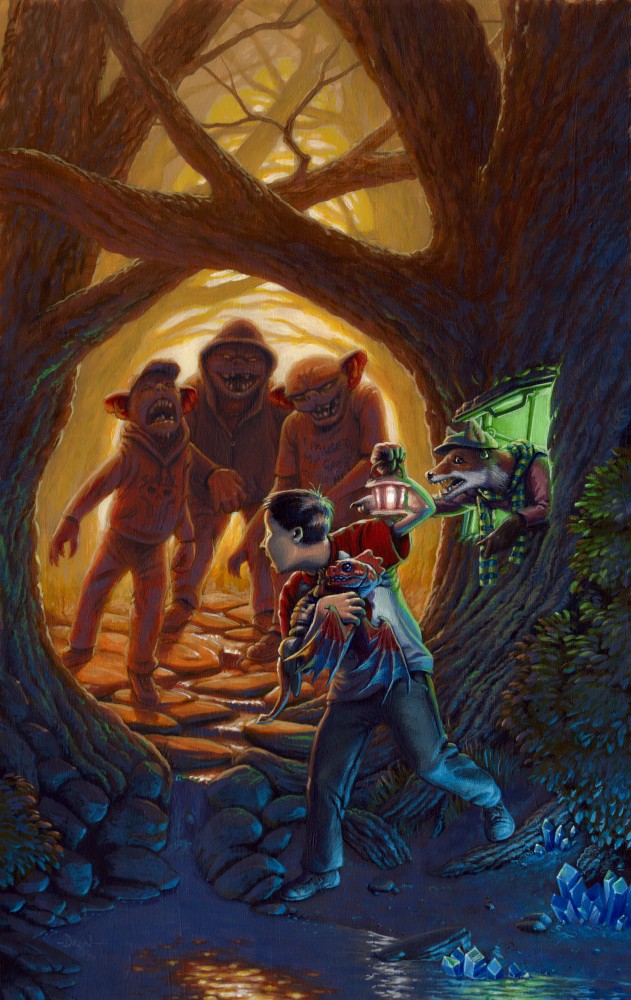
To the right is a painting I recently finished, and please note that all images can be clicked on to see them larger. But it didn’t start off ready to paint; first I had to come up with a concept and develop it until it’s ready.
Just below you see the concept sketch, which lets us jump right into…
Lesson 1: Allow yourself to make ugly art.
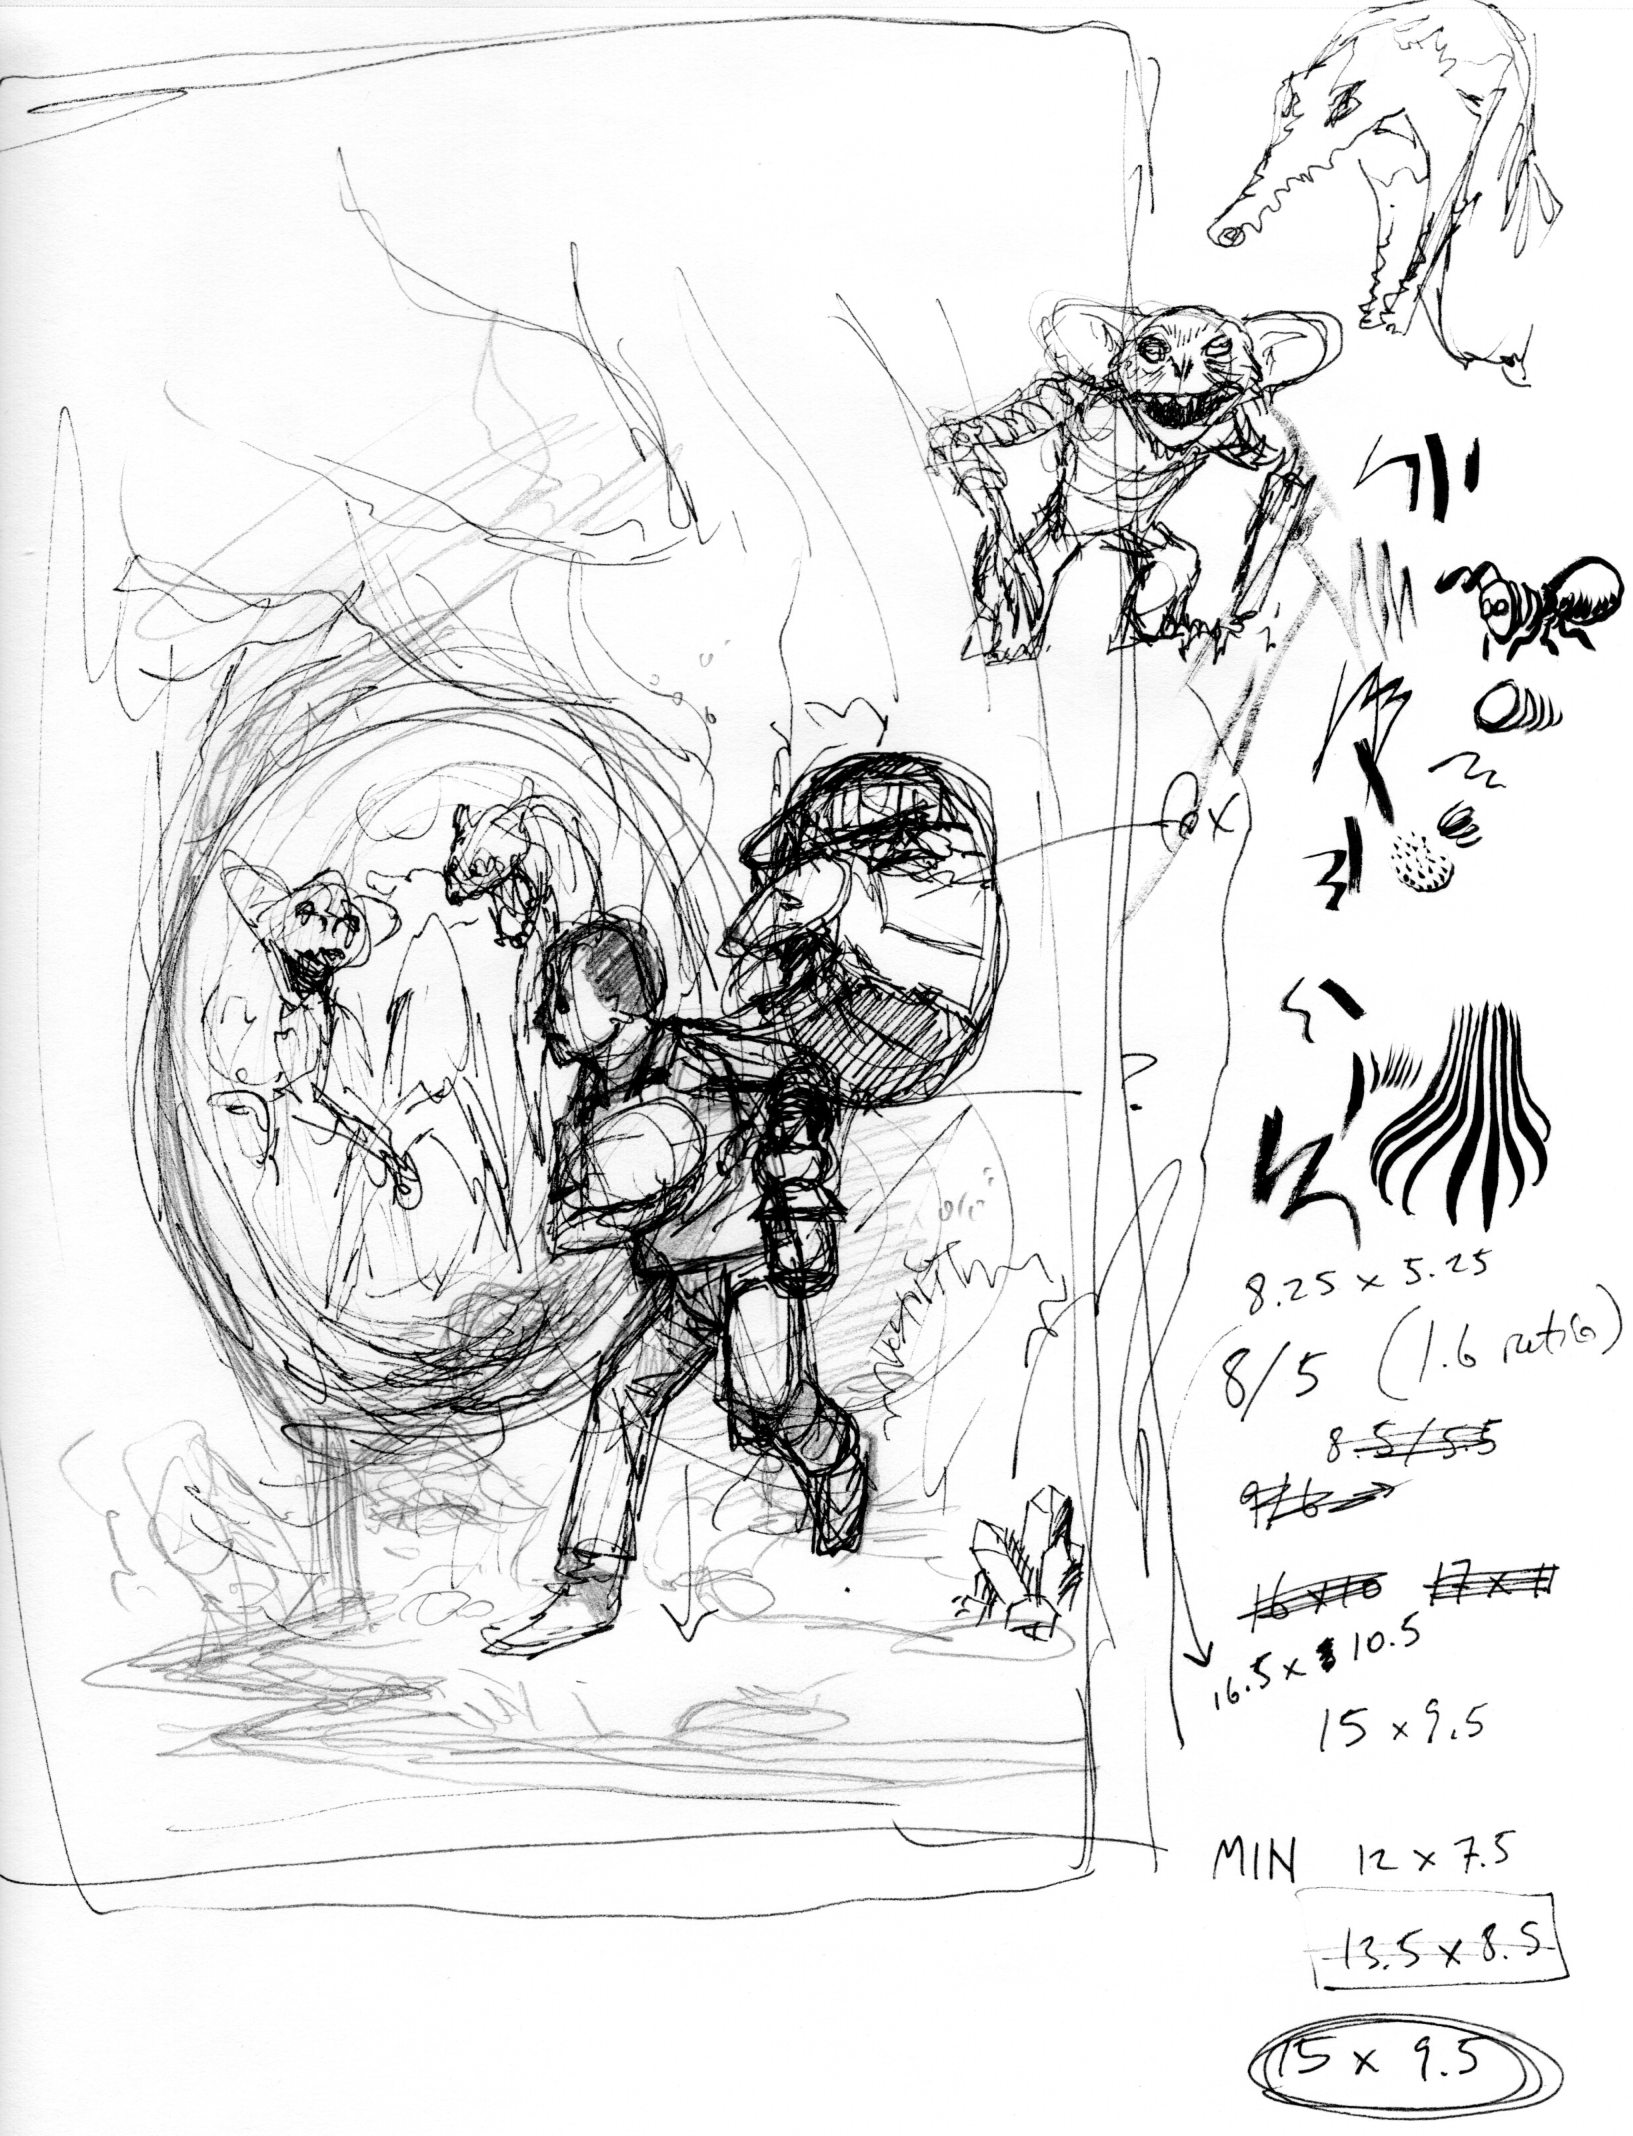
You know how people talk about finding the diamond in the rough? This is the rough. The point to a concept sketch is to find an idea, not to create polished artwork. That means that you’re using your artist’s eye to see the potential in the concept sketch. At least for me, good artwork is the end of a long process, and that process begins by allowing myself to make ugly (sometimes horrible) art.
The refinement comes later. For example, the creature reaching out from the right in the concept sketch was rough. What is that thing? A rat? A weasel? Spuds MacKenzie reaching out from the 80’s? NO! It’s a fox! Which you’d know if you could see into my mind’s eye. Which you can’t. It’s not even clear that I can draw what’s in my head. I need to develop these characters more before I know whether my ideas will work.
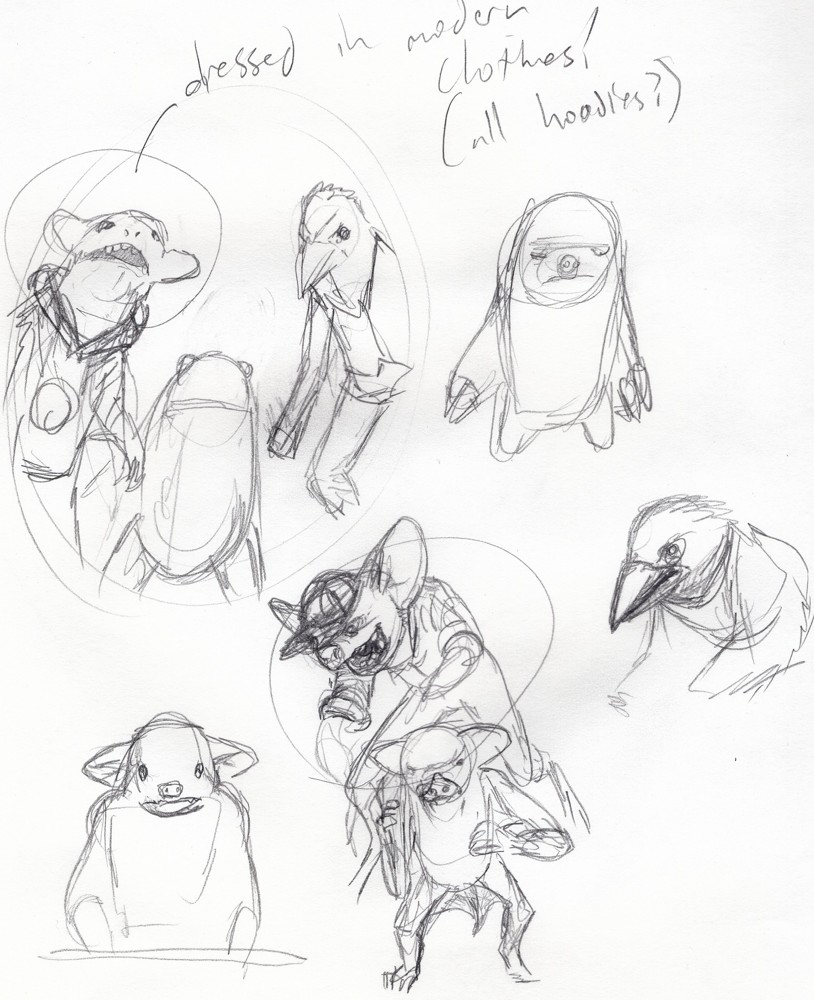
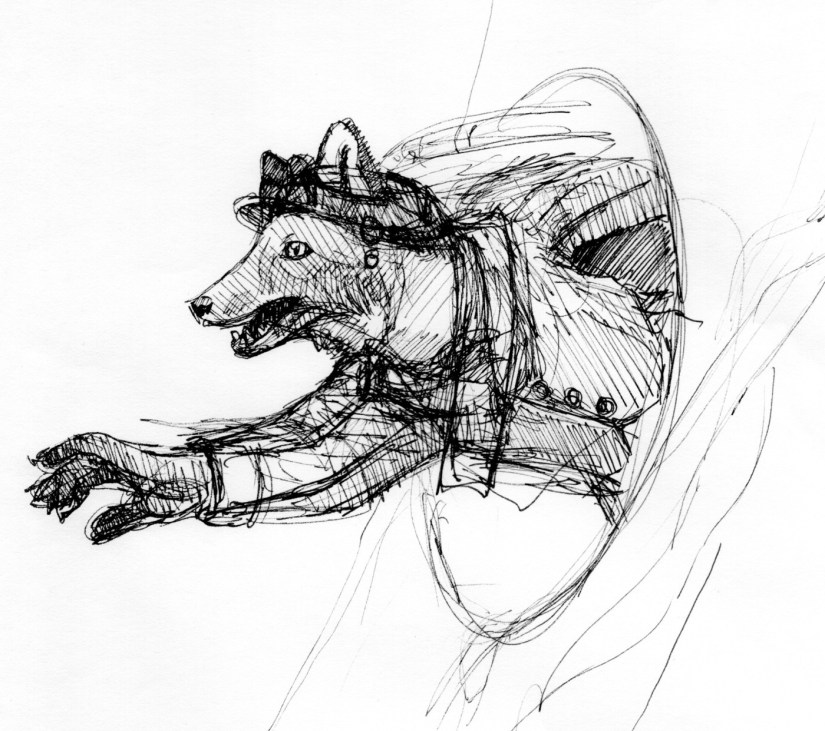
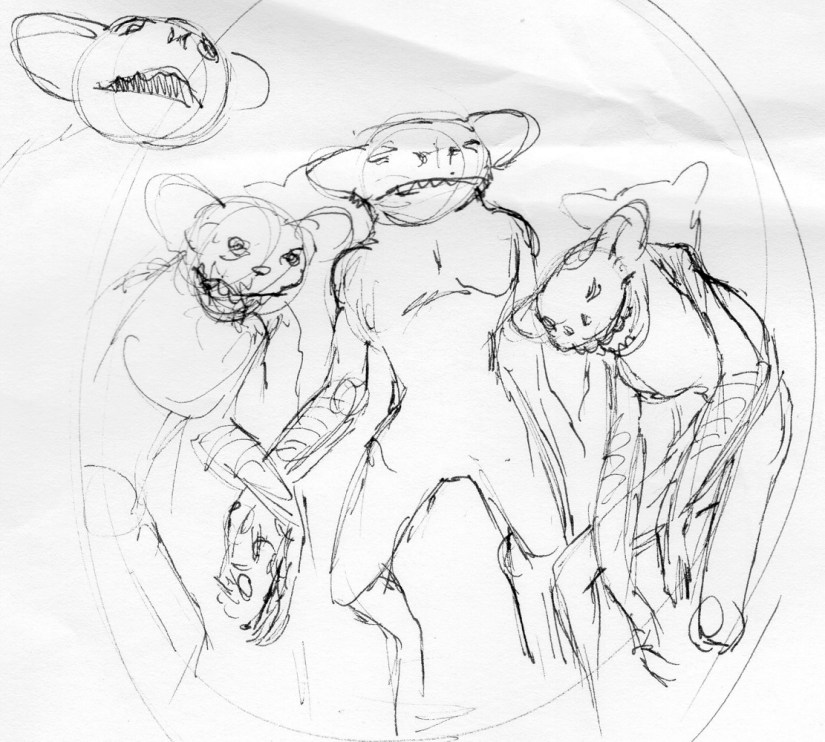
Above you see sketches for the fox character and the goblins. The fox is in a pretty good place, whereas you never see the final goblins; I’m working them out in my head, with sketches on the paper simply as an aide. The poses can change, but now I have real character with details and a feeling I can grab onto. I used the computer to add the new fox into the scene, below.
Some things are still in the air: the main character, whatever he’s holding, the design of the creatures chasing the hero, etc. But the parts I needed to figure out in sketch are done. Next comes…
Lesson 2: Photo references.
When I was starting out many years ago, I thought that the use of photo references was for amateurs and wannabees. Real artists had enough anatomical knowledge and robust imaginations that they could bring forth everything they needed from their minds, fully formed, like Athena bursting from her father’s cranium.
I thought this because I was young and stupid.
I was wrong, and my art improved many times over after I got past that stumbling block and began to use photo references. Quite simply, there is so much to anatomy, lighting, the draping of fabric, and more that few artists can conjure it all from thin air in a genuine way. For most of us, it won’t have the authenticity of an image based on carefully chosen photo references.
If you’re just starting out and need permission to use photo references and still feel like a real artists, you are now granted that permission. I use photo references, an so do most of the professional artists I know.
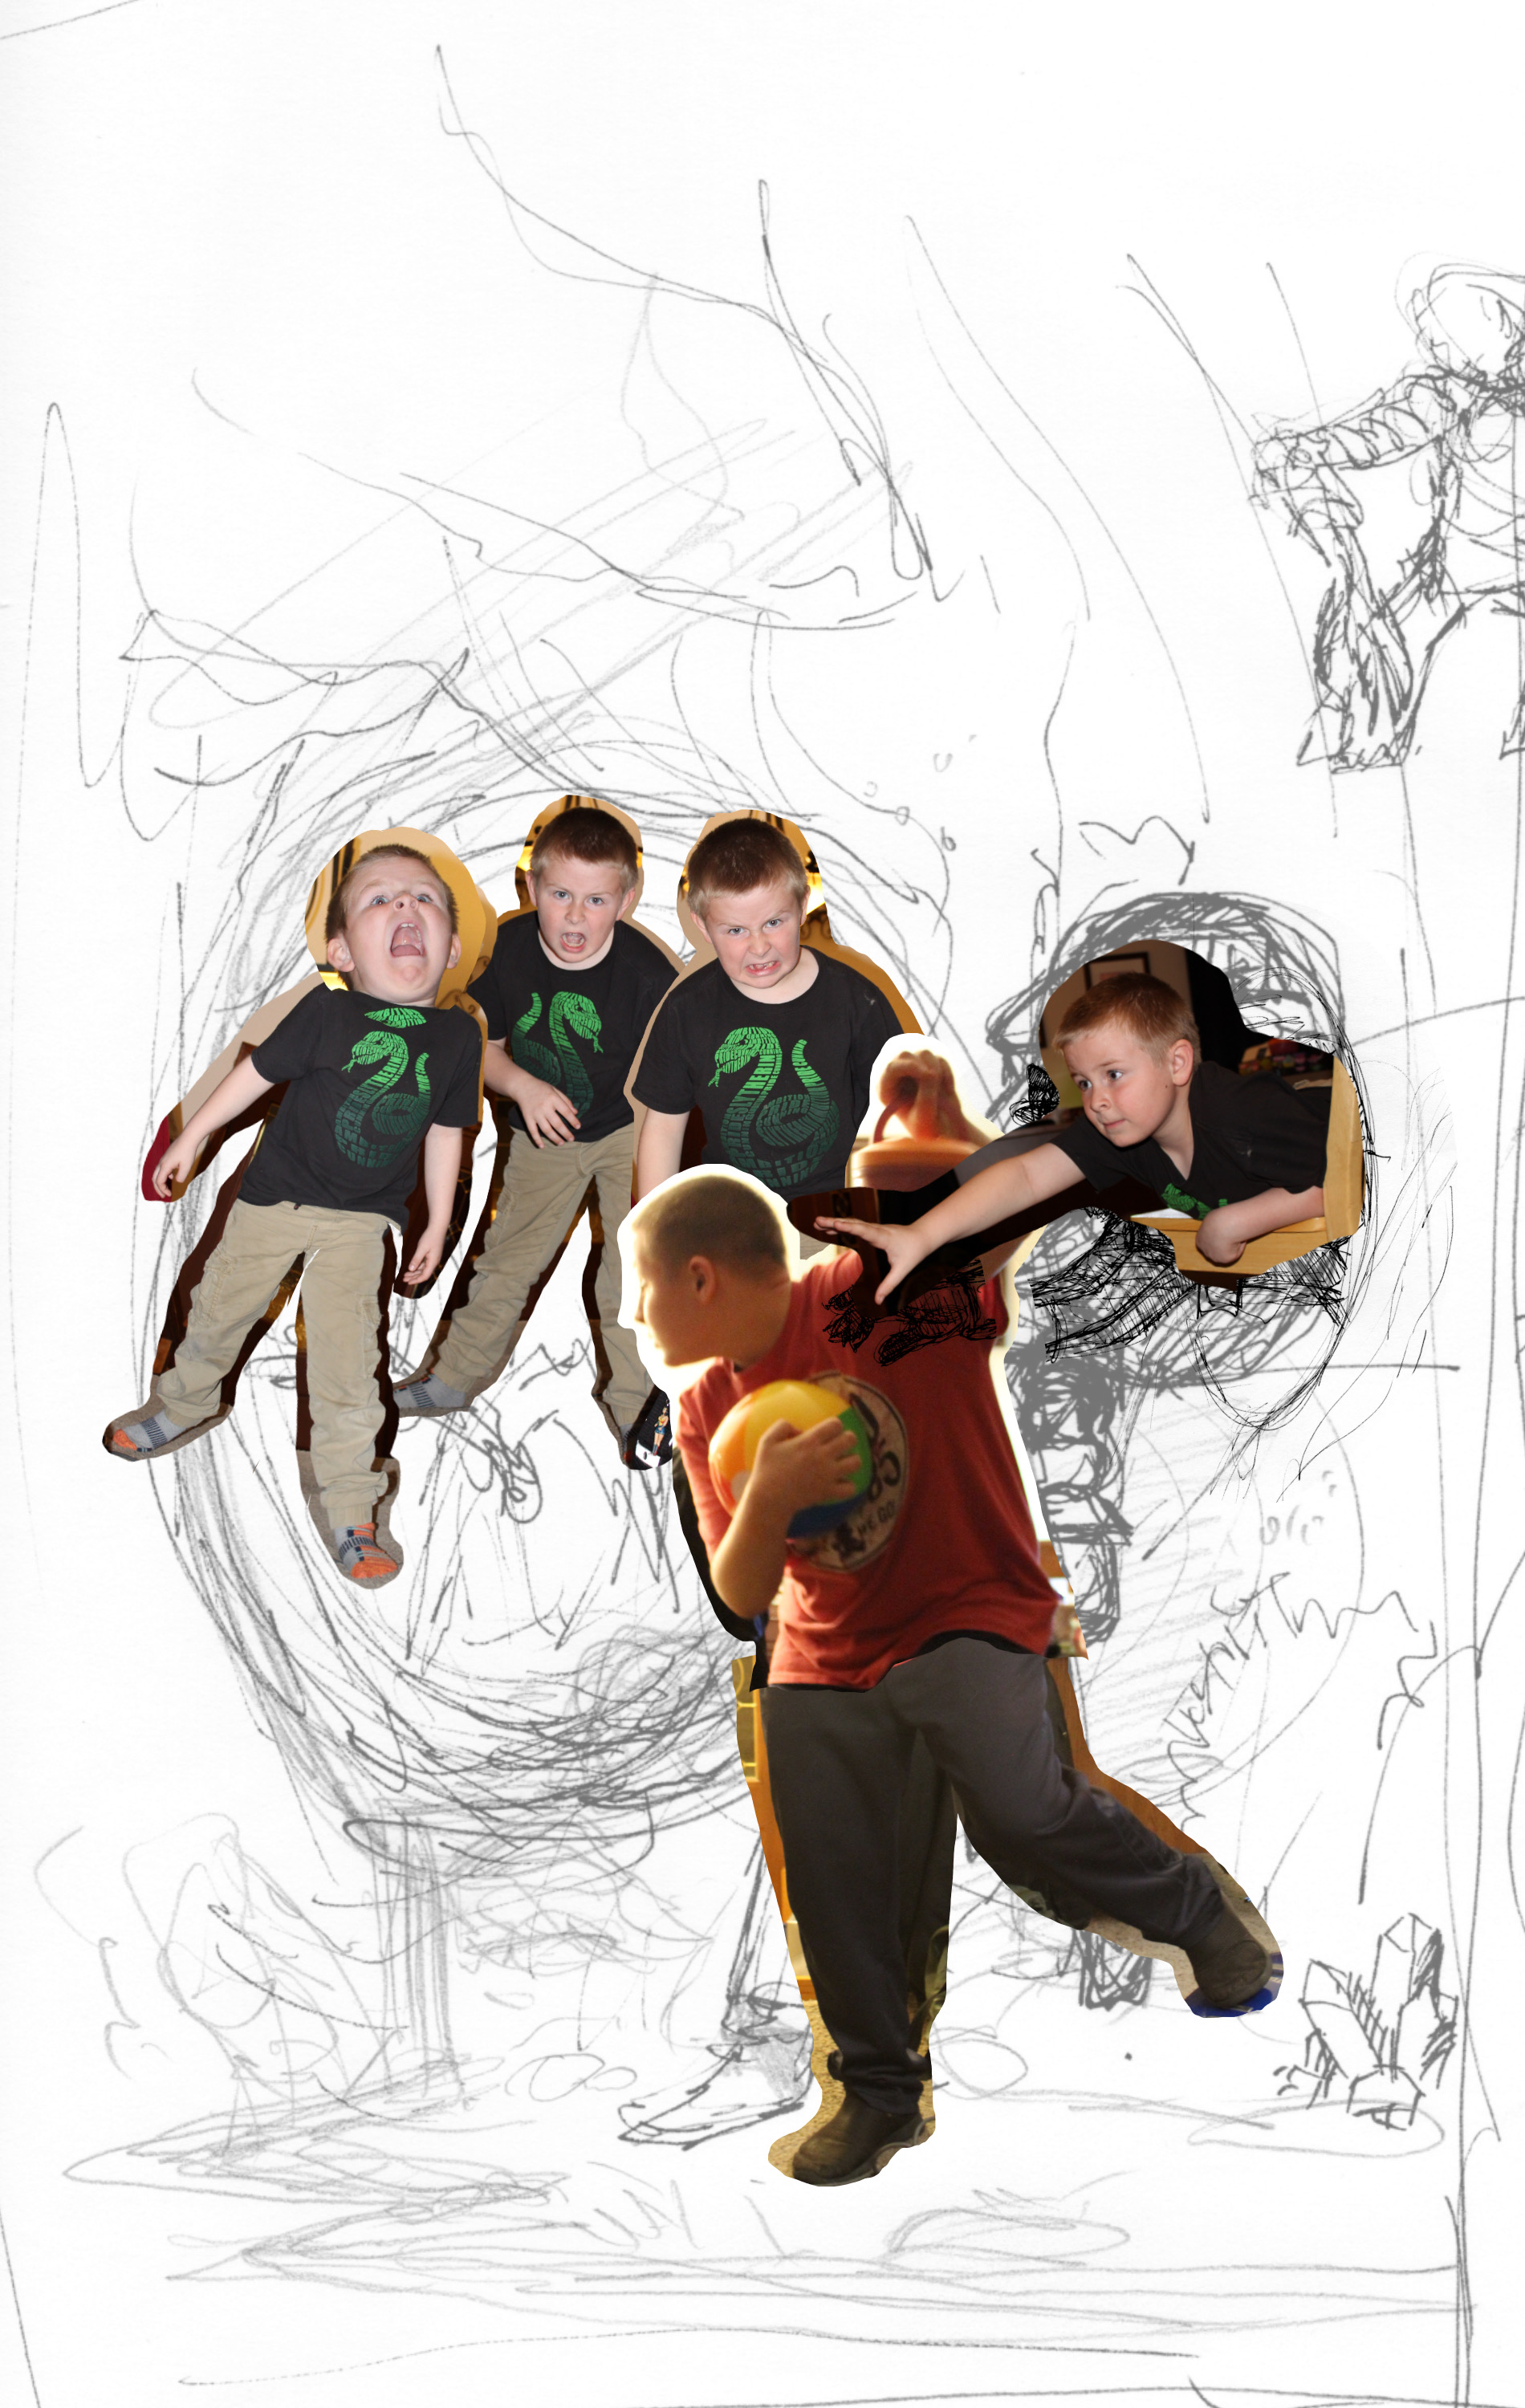
Back to this piece. My next step was obvious – go find some goblins to pose for the camera. When I couldn’t manage that, I did the next best thing – I got my children to pose. Seriously, children are fantastic for getting photo references of strange creatures. They love this kind of thing. They get into it with a passion. Look at those pictures of my younger son as the goblins. He jumped into that role and became those goblins.
My thirteen year old allowed me to take a few pics, too.
Your project may call for you to cajole the help from friends and family, find online images, or even pay a professional model. Whatever your needs, don’t do what I once did and convince yourself that you can do well enough without. Find and use references.
At this point, I have a final concept and I can move on to creating the final underdrawing –i.e. the drawing to be painted over. I’ve worked out that I want the final to be 9½” x 15”. That fits the dimensions of a mass market book cover with bleed added around the edge, scaled up to a size that will let me get some good detail without taking too long to paint. You can see me working that out on the right side of the original concept sketch. Art math!
The problem is that the sketch is only a few inches across. The solution is…
Lesson 3: The Grid.
The grid method of recreating and enlarging has been around for at least several thousand years. The Egyptians used it. Medieval artists used it. And today, most children come across small versions of the grid method in activity books. I remember using it to recreate a Scooby Doo drawing in the parking lot of an Albertson’s when I was young.
If you haven’t used it, or at least not since you were a small child yourself, the concept is simple: you create a grid on the sketch, and a larger version of the same grid on the painting surface. Then you simply redraw what’s in each square.
To make the measuring easy, and because a one-inch-square box seems about right for the amount of detail to transfer at a time, I use a ruler to draw lines one inch apart all the way down and across my drawing. Then I scan the sketch onto the computer, open it in a Photoshop-style program, set the live portion of the sketch to the same dimension as the intended painting, and use the guides and line tools to create the same grid (on a separate layer from the drawing itself). I print this out, then number the lines from top to bottom and left to right on both the printed sketch and the final painting. You could, alternately, number the boxes between the lines; it doesn’t matter, as long as it works for you.
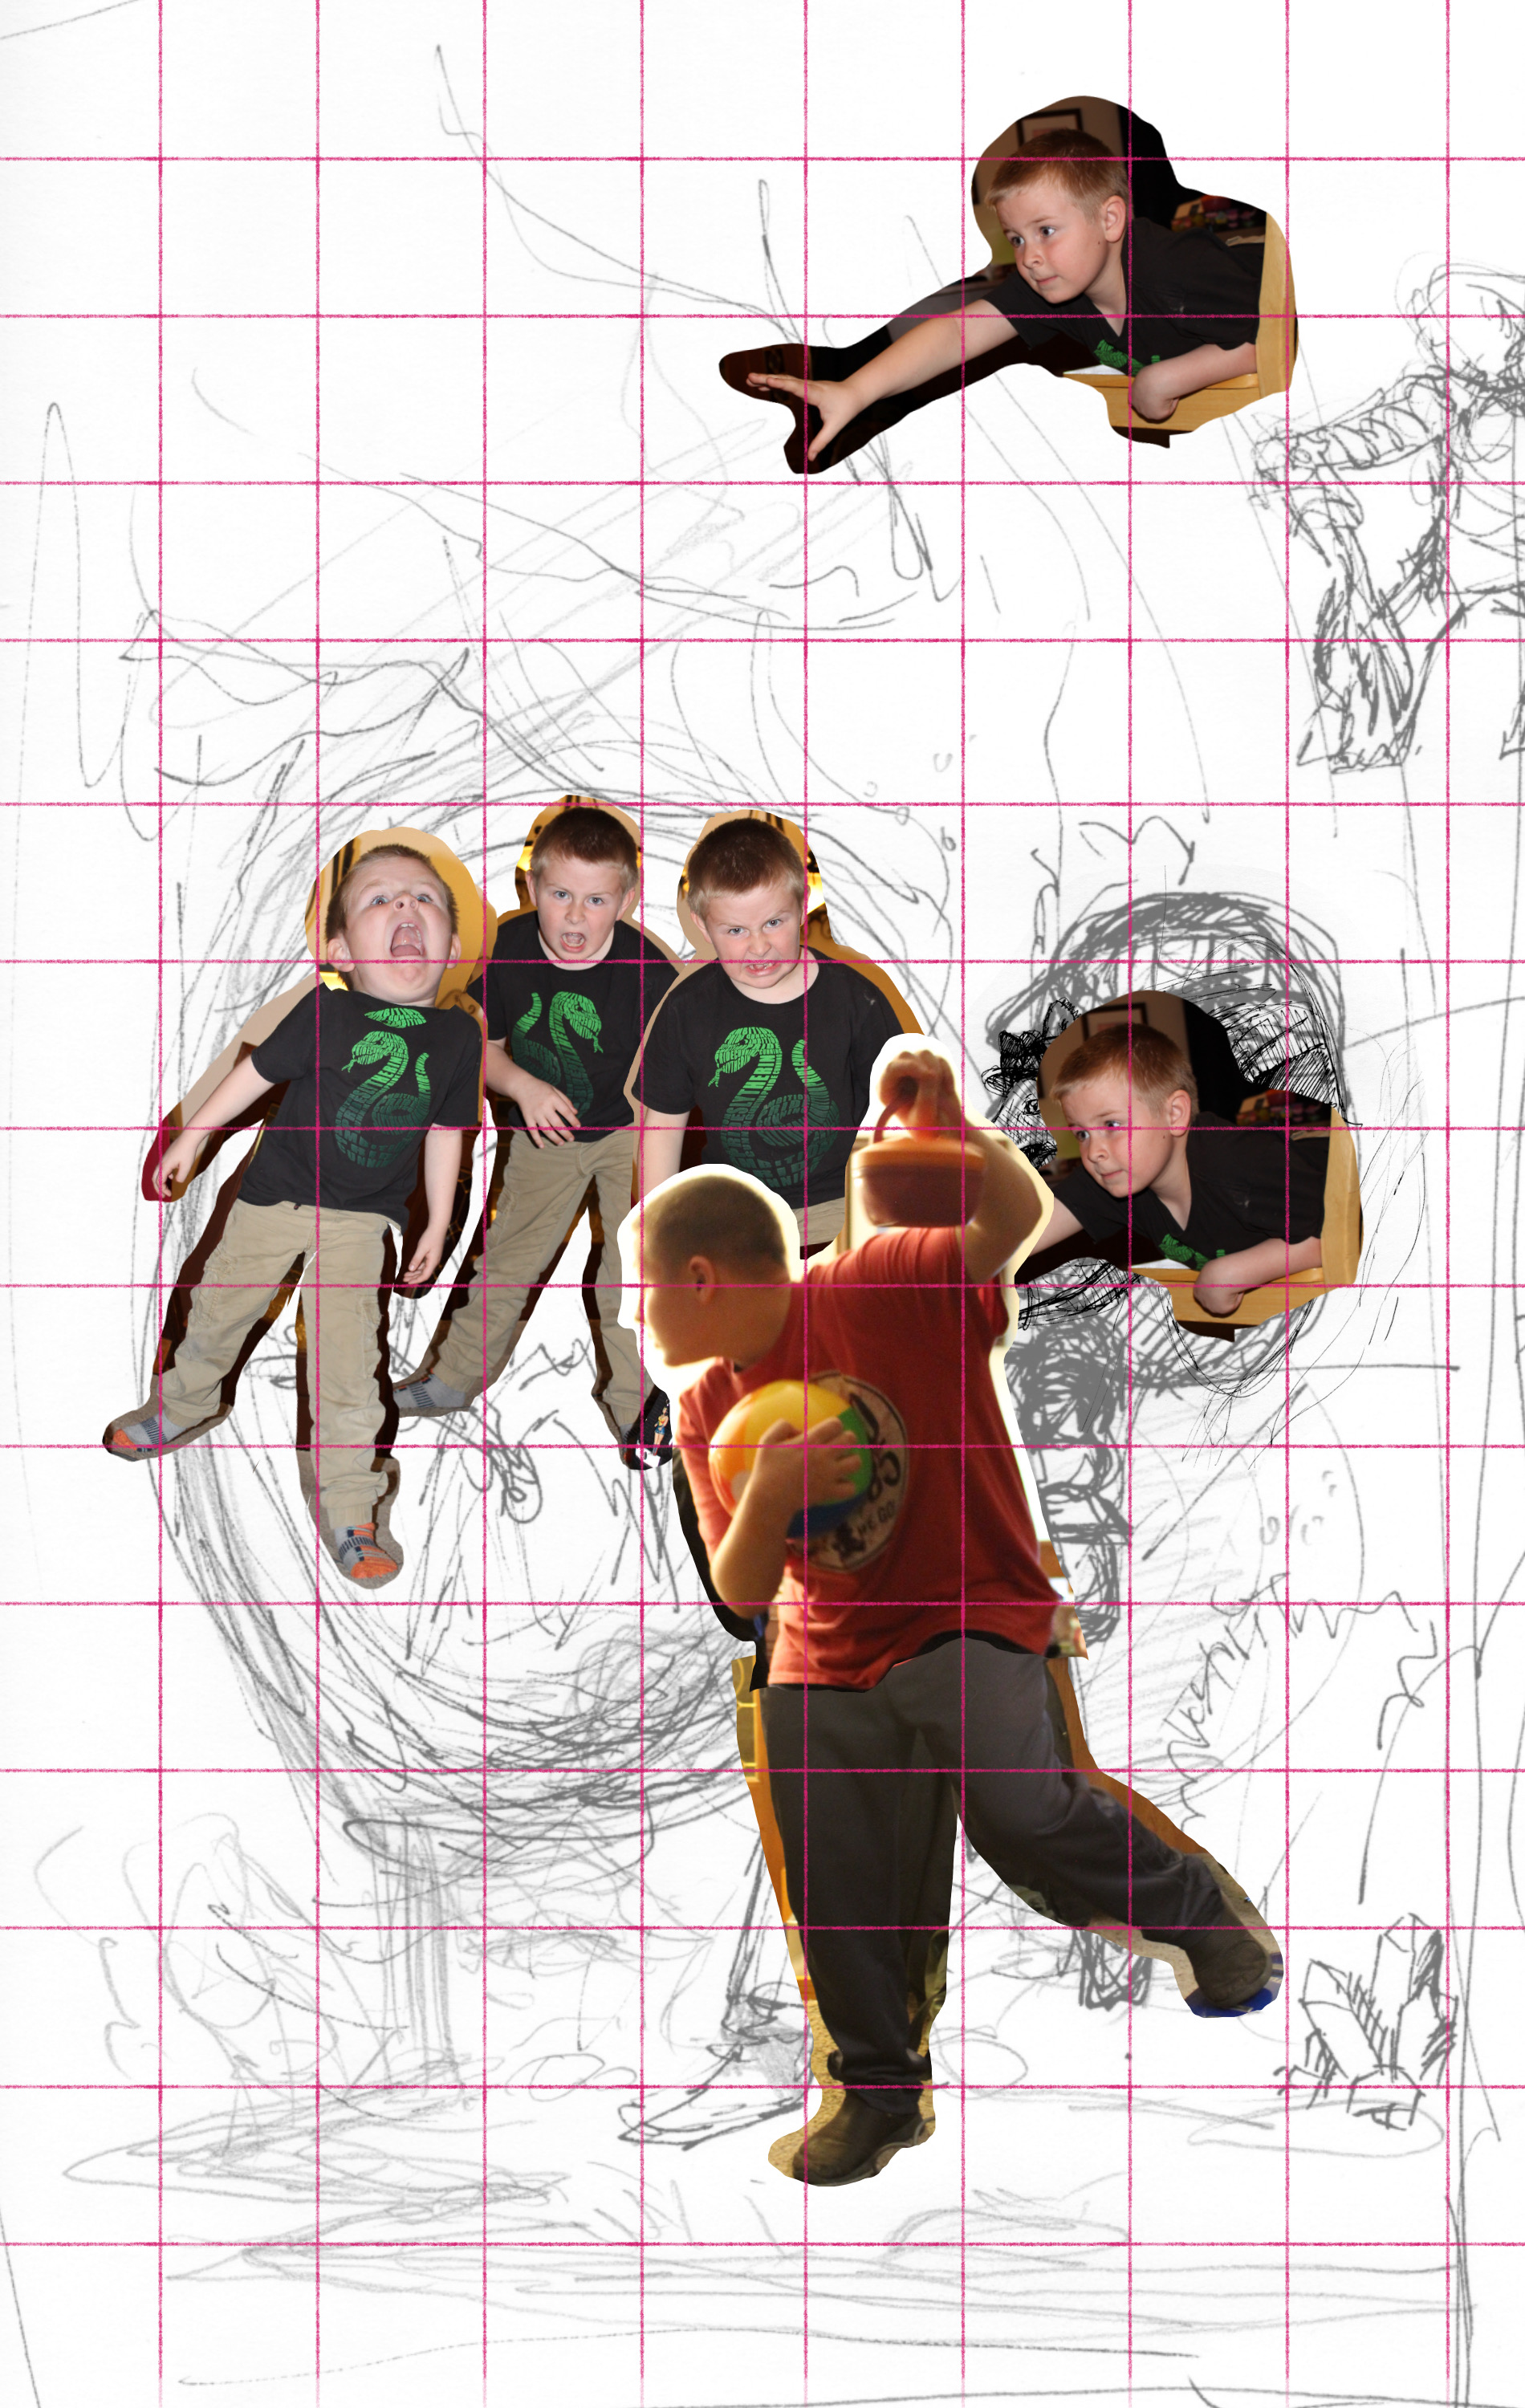
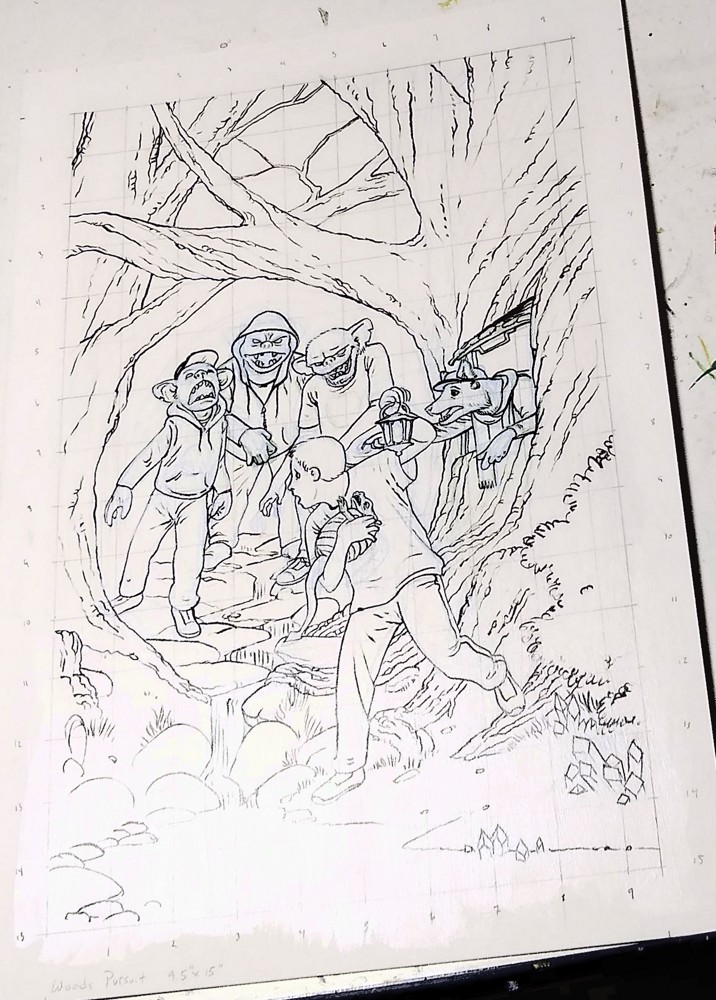
In the image to the left, you can see the gridded sketch, and on the right, the final drawing. The numbers are visible down and across the sides. Each square (for instance, the one starting at 3 across, 5 down) contains the same thing as the sketch, only refined and developed for the final painting.
There you go. You’re ready to use the grid method as well as a professional artist. Or child. Or Egyptian.
Until next time, go make ugly art. Then make it beautiful.
